Passion
Personal Projects
In my free time, I enjoy working on personal projects that grow my skills and merge my interests.
These projects grow my CAD modeling, material creation, and product visualization skills while also exercising my interests in photography, home renovation, and home goods design.
Section 1: Product Design & Visualization
Section 2: Home Goods Design (Tea Light)
Section 3: Furniture Restoration
Product Design & Visualization
Section 1
I enjoy participating in industrial design-focused challenges put forward by pages like Render Weekly. I find these challenges fun and engaging and a great opportunity to practice skills that I may not always get to use on client projects.
I really enjoy creating procedural custom materials with imperfections and realistic textures, as well as bold and dynamic lighting and compositions. My photography background informs my approach to each image to make the final result believable and visually stunning.
Section 2
Home Goods Design: Tea Light
Goals
This was a collaborative project between my husband Jacob Tesmer and I. He is also an industrial designer and we take every opportunity we can to join our creative brainpower and work as a team.
Here are some of our goals for this project:
Practice designing together— We love doing this, but can we see it all the way through??
Create a small lighting product that we can produce ourselves
Utilize our MSLA 3D Printer
Utilize laser cutting
Make it fit with the Esteldor brand
Sell under Esteldor at local antique mall
Current Esteldor art and design
Mid century modern design
Mushroom trend
Art Nouveau style
Warm tones
Natural materials
Diffused lighting
Inspiration
Brainstorming & Sketching Session
Prototyping & Development
After Jacob refined the final design through sketching, I modeled it in CAD. I created STL files for printing and AI files for laser engraving the base.
We prototyped several different form factors for the design, testing different materials and shapes to see how the light interacted in the space.
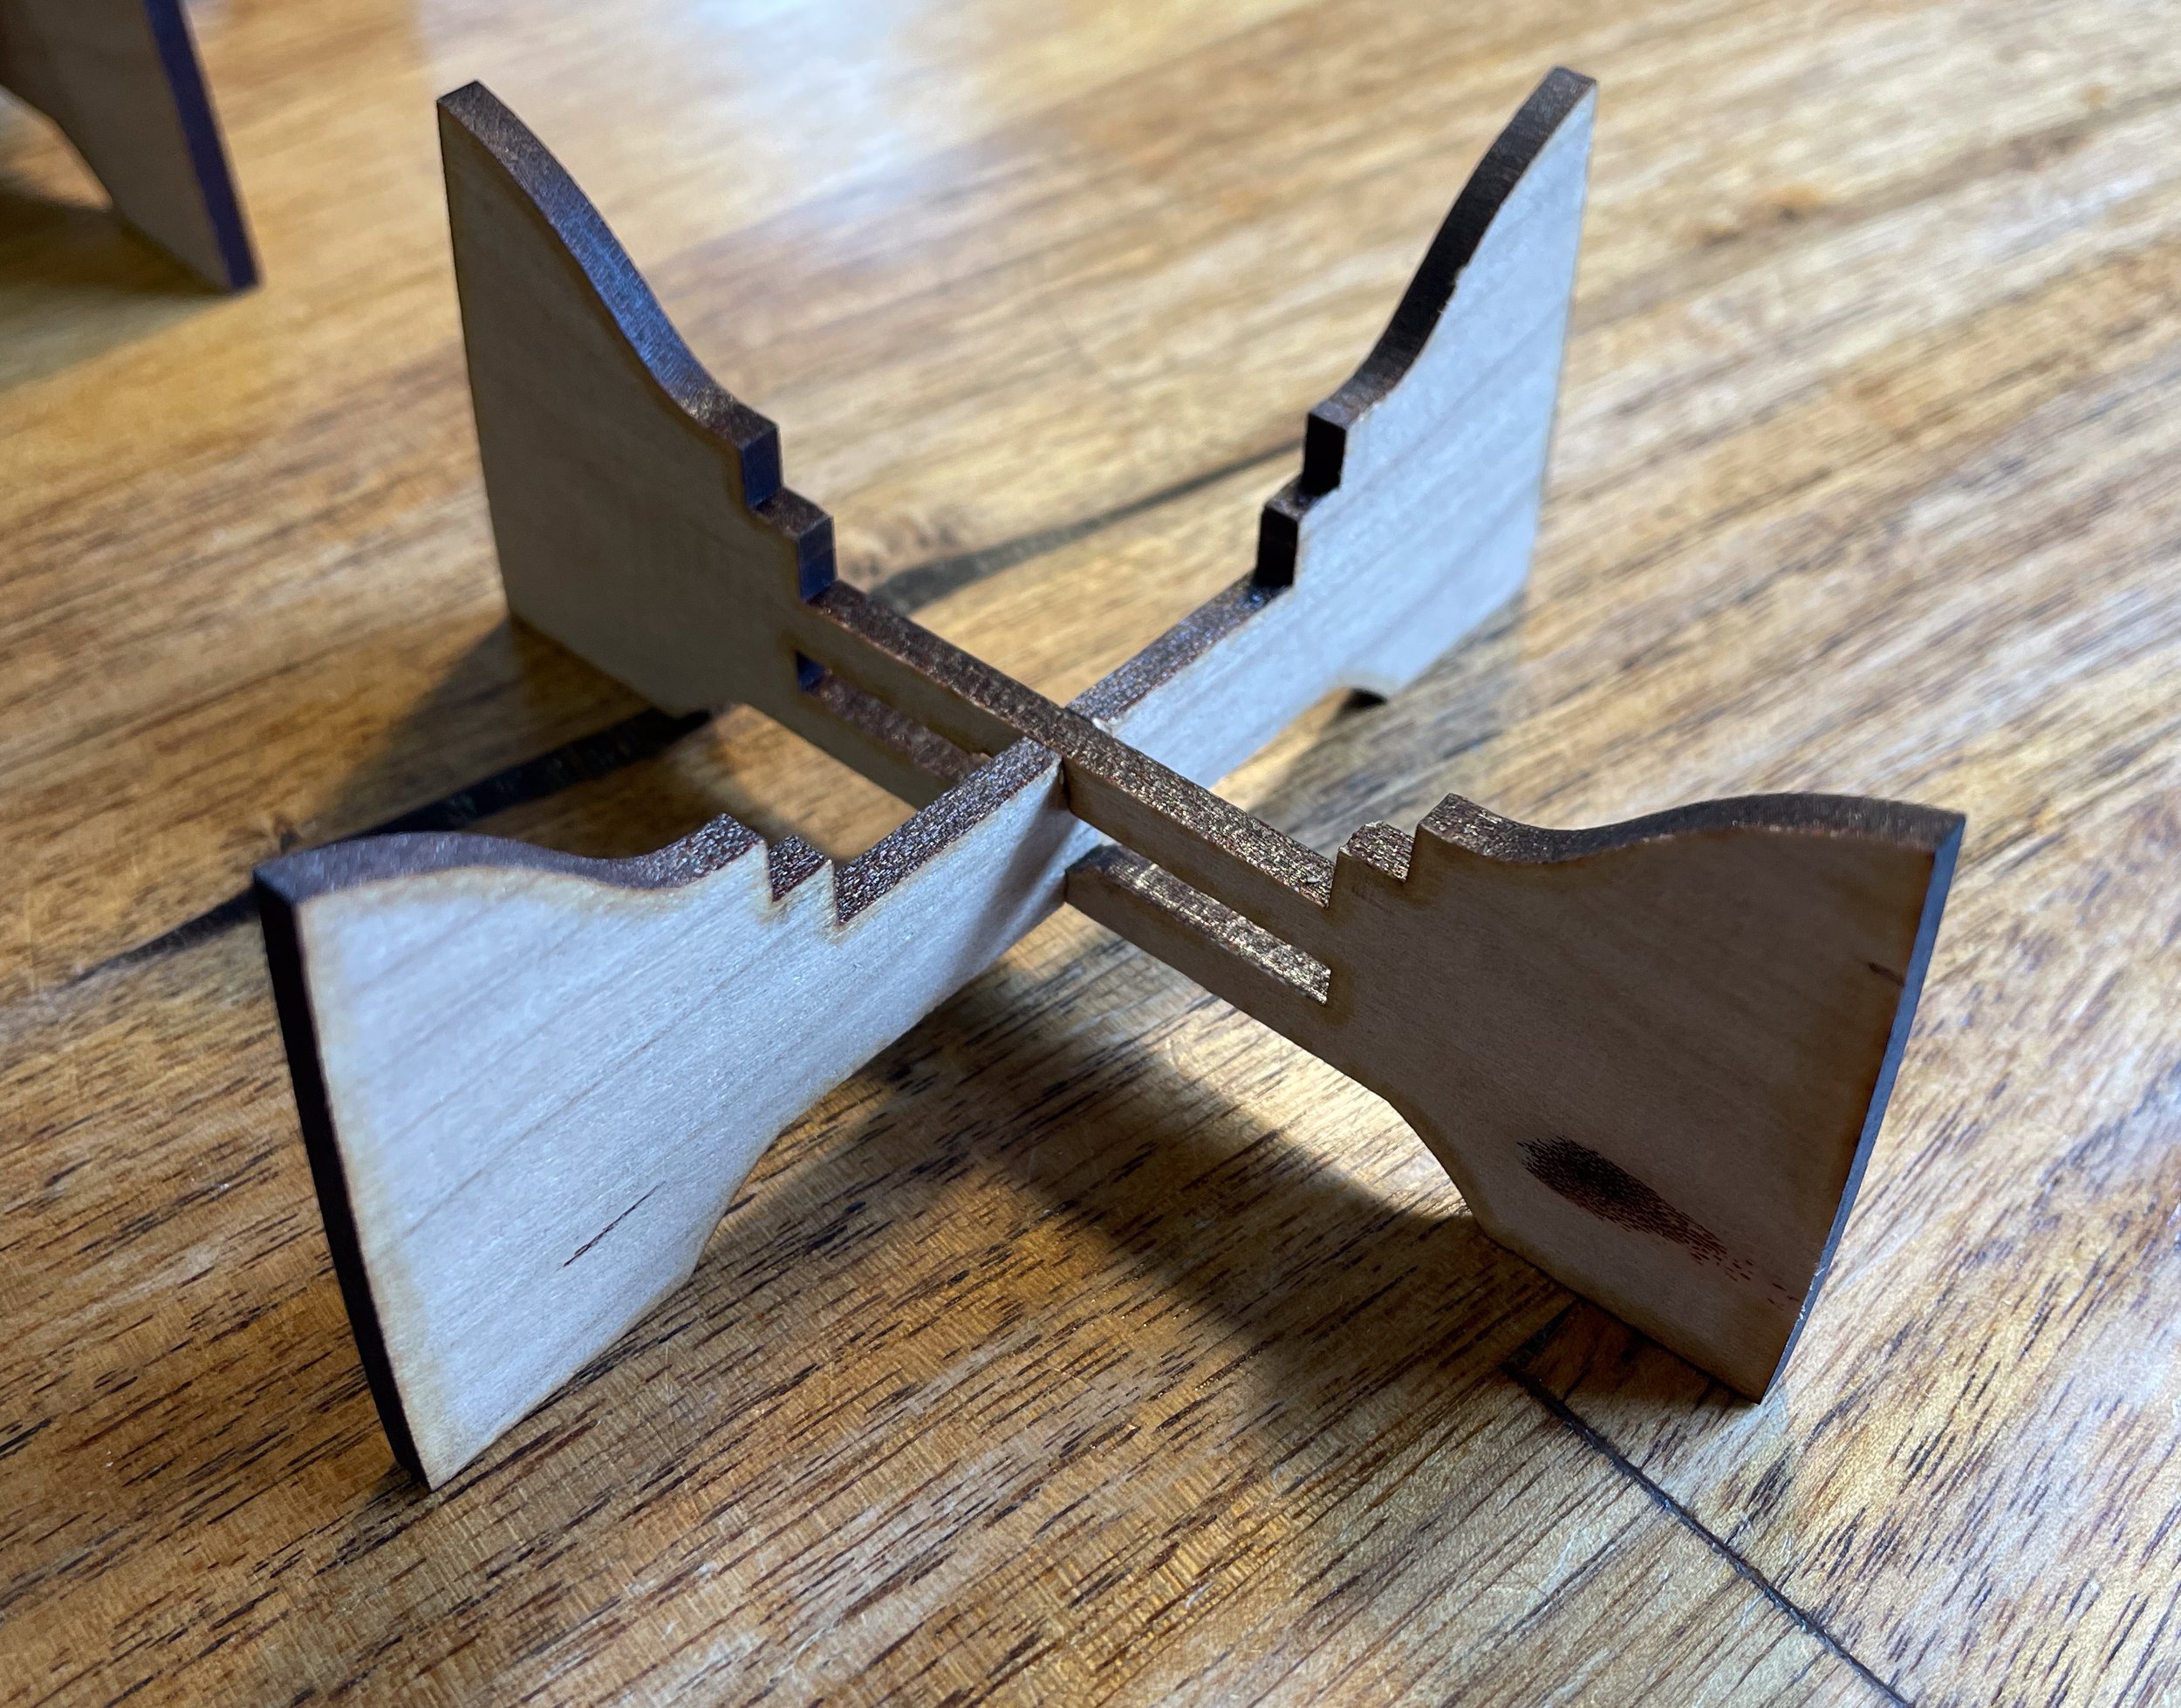
We also prototyped several different ways to assemble the base. We deciding on a slotted design that was the most durable, minimal, easy to assemble, and allowed for some air flow around the candle.
Optimizing for Production
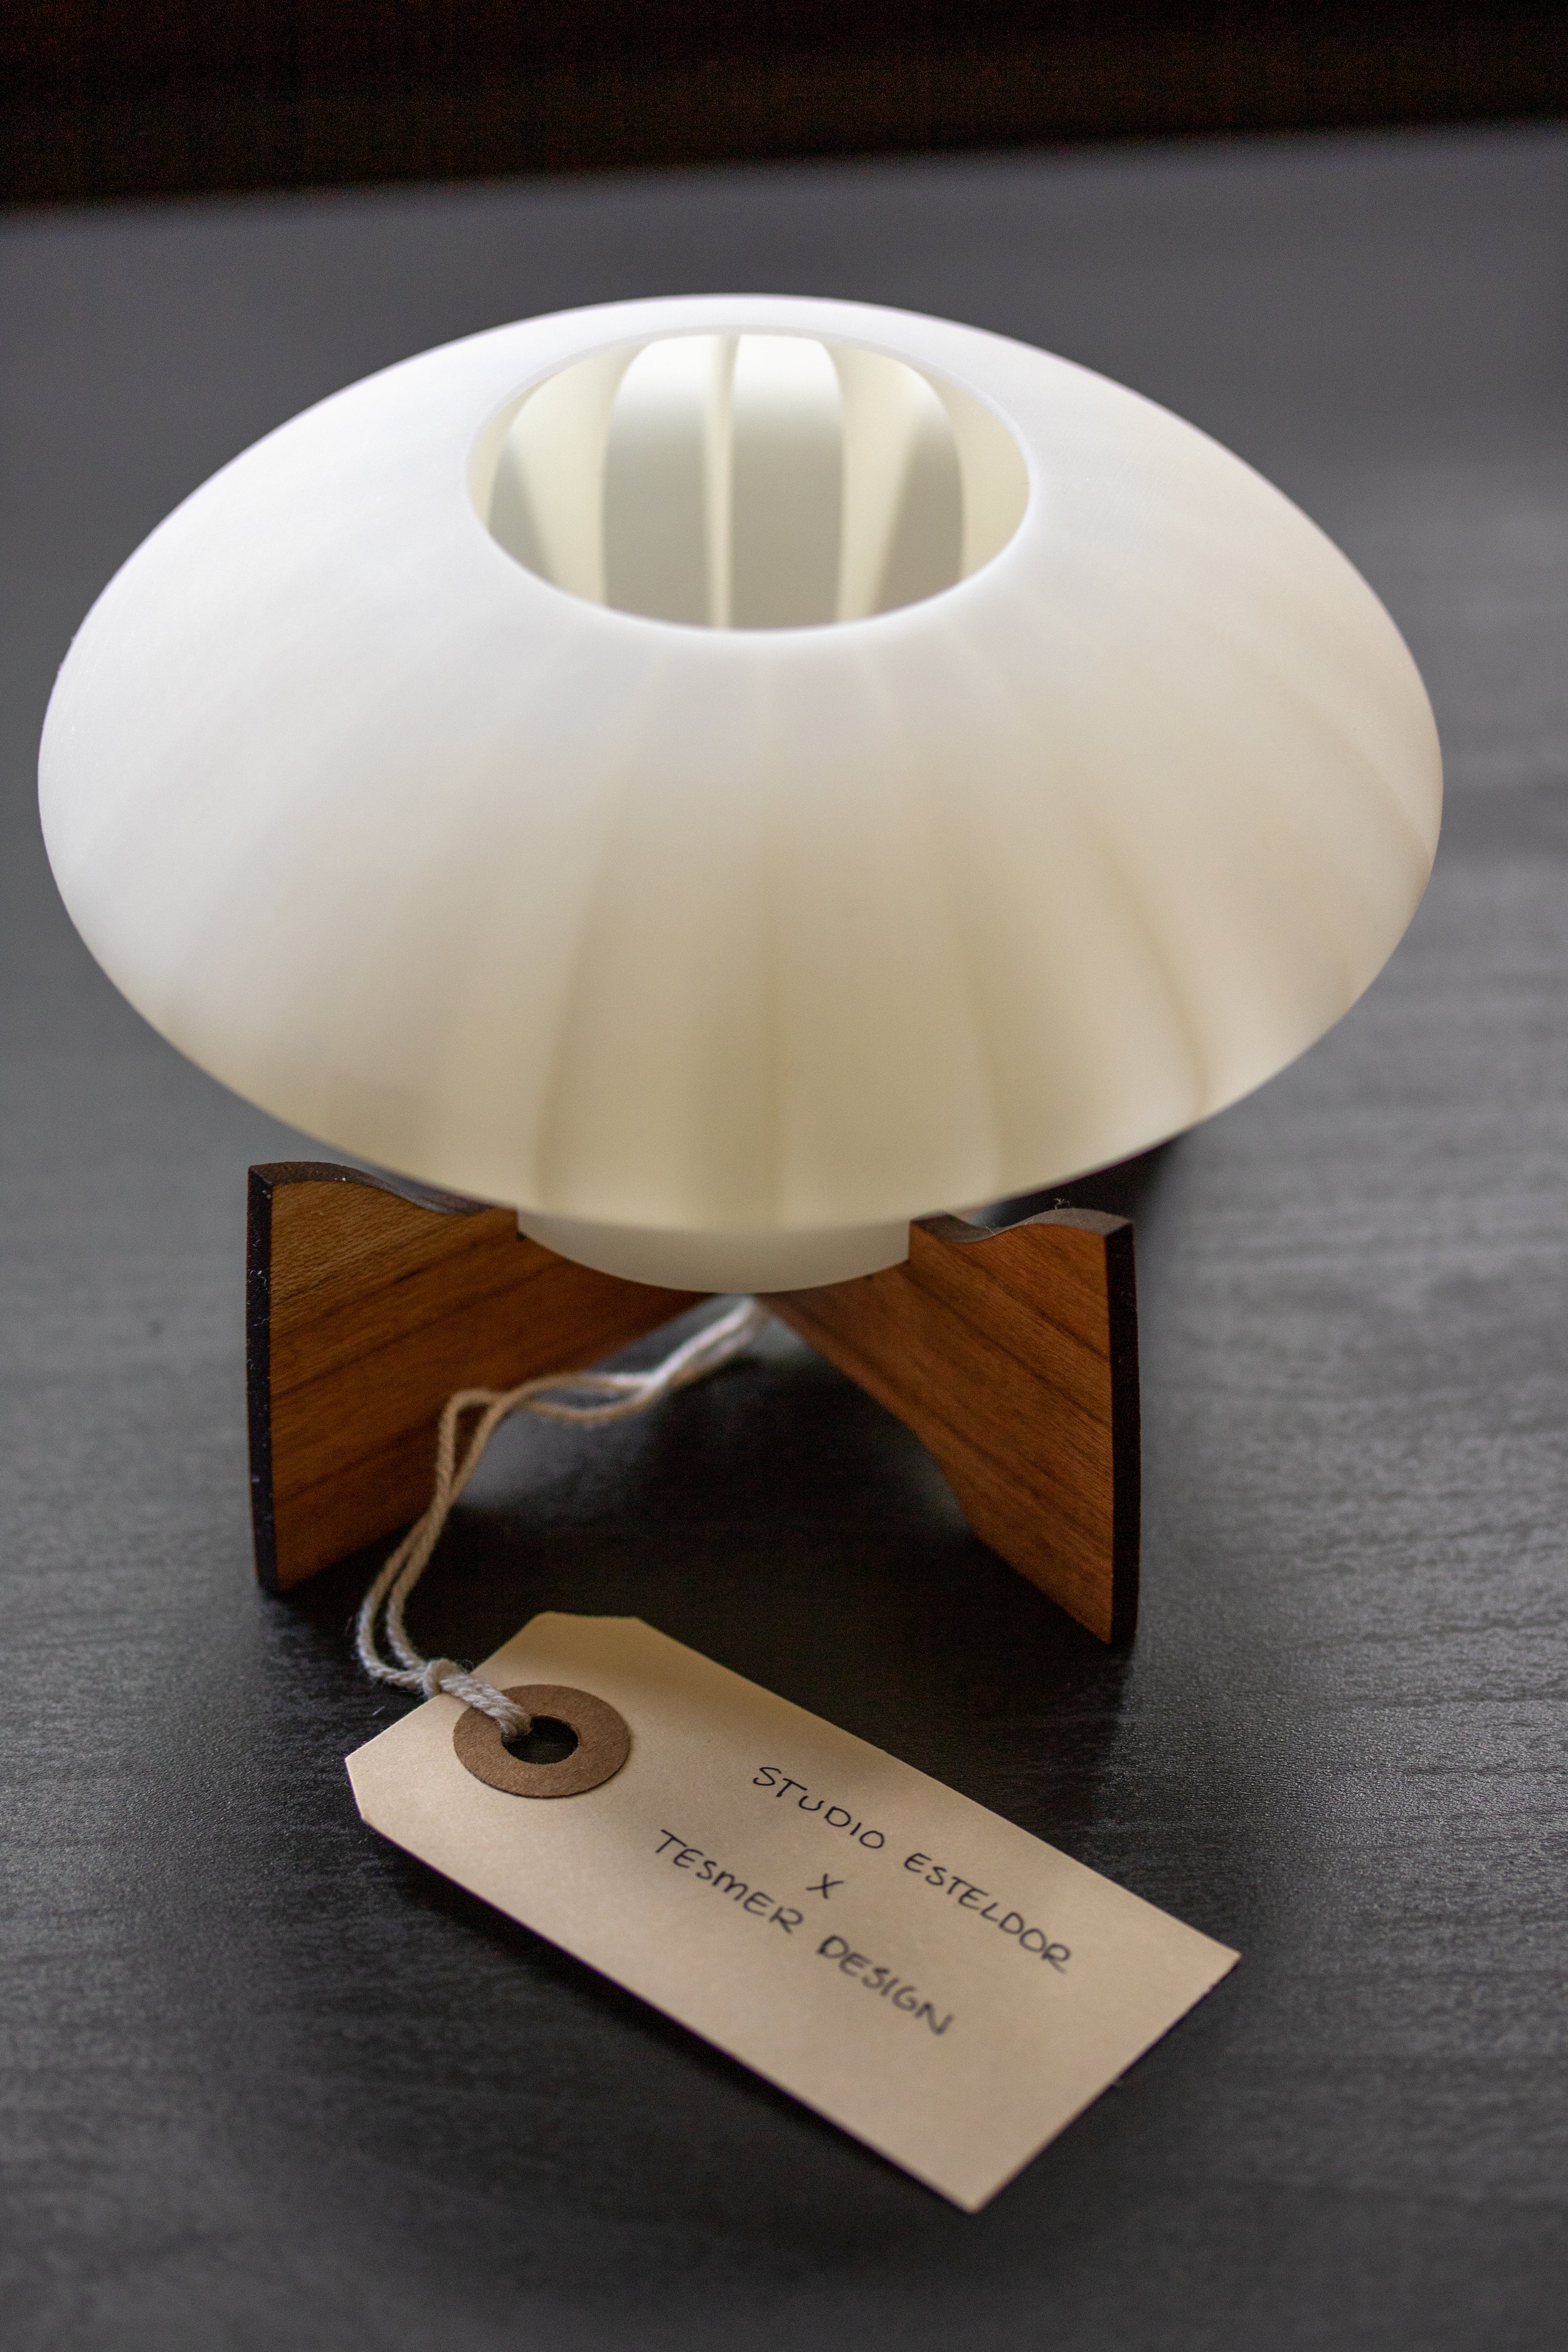
The shape of the shade was inspired by iconic mid century modern design, and optimized for printing on an MSLA resin printer.
The thicker ring at the bottom allowed for just the right amount of supports so that the shade could print vertically. This also eliminated the need for any finishing processes on the rest of the surfaces.
The ribs provide visual interest when the light is on, but also provided structural support during the printing process to minimize waviness or warping.
Final Components
The shade was printed in deft resin on our Peopoly MSLA printer.
We sourced several different brands of LED tea lights to find one with the correct light temperature and flickering effect.
Since these were going to be sold locally (not shipped) we glued together the slotted base for stability.
The base was laser cut out of solid cherry wood and etched with the “Studio Esteldor” mark
Final Product
As the final result of this project, we produced one pair of tea lights and sold them at a local antique mall under the Esteldor brand.
Goals Met:
We successfully designed and “shipped” a product together—playing to each other’s strengths while respecting the process
We produced and sourced all components ourselves
We utilized our MSLA 3D Printer
We utilized laser cutting
We made it fit with the Esteldor brand
We successfully sold the final products
Section 3
Furniture Restoration
Before:
My husband and I found this Eames fiberglass buried behind and under things at a small town antique mall.
It had been bolted to a shop stool and had spray paint and rust all over it.
Based on the markings and color of the chair, we estimate it to have been made sometime between 1965 and 1976.
After:
We cleaned up and sanded the paint off the shell, filled the bolt holes with resin and attached a new rocking base.
The final result is a beautiful piece of history that is also comfortable and great conversational piece to have in our living room.


